Wednesday, June 30, 2021

कहाँ गयो सर्दुको हरियाली !


कहाँ गयो सर्दुको हरियाली !

त्यो दिन । दिउँसो सवा बाह्र बजे । चर्को घाम चौकीदारी गर्दैथियो । मैले एकाएक चिण्डे डाँडा हान्ने भएँ, एकल फौज लिएर ।

धराने ‘सर्दुखोला’ पारि बज्रासन गरिरहेको त्यो मुडुलो डाँडा । हिंड्दाहिंड्दै सुनिललाई मोबाइल लगाएँ । ऊ कट्टु लगाउन थालेदेखिको मेरो दोस्त । मलाई साथ दिन लुसुक्क बाटामा निस्कियो । एकलबाट दुकल भो अब मेरो फौज । जनपथको सिरानतिरबाट यो दुकल फौज सर्दु झर्‍यो । मान्छे हत्तपत्त हिंड्न नरुचाउने दुर्गम बाटो समाएछौं । देख्यौं, भुइँभरि बग्रेल्ती इन्जेक्शनहरू । एकान्तको लाभ दुव्र्यसनीले लिएको संकेत सुनिलले नगर्दै मैले कुरो बुझिसकेथें ।

सर्दुभित्र बस्तीहरू ! खोइ सर्दुखोला ? खोइ सर्दुको खाइलाग्दो त्यो जीउज्यान ? धरान बीचोबीच भएर बहने साँघुरो खहरे खोला र धरानलाई बाइपास गरेर बग्ने सर्दुबीच के रहृयो भेद ? सुनिलले मेरो प्रश्नको मुसलधारे बलिङ फर्काएन ।

उसको अनुहार पुलुक्क चियाएँ । नबोली ऊ भनिरहेथ्यो- ‘सुकुम्बासीका नाउँमा बस्ने हुकुम्बासी छन् यहाँ ।’

आफ्नै जमीन मिचिएर सुकुम्बासी भएको सर्दुखोला यतिखेर रुँदै बगिरहेछ, अहिलेको धरानमा ।

जीवनको आधाउधी विकेट गुमाएपछि यसपालि सर्दुखोला छिर्न भ्याएको रहेछु । मैले छाडेको अतीतलाई चियाएँ । कमसेकम पैंतालीस-छयालीस वर्षअघि म यो खोलामा पहिलोपल्ट घुसपैठ गरेको हुँला । ती दिनहरूमा हामी रातामकै थियौं । बदमासीका सफल-असफल परीक्षण यसै खोलामा गर्न भ्याएका थियौं । फट्याइँको एकसेएक रेकर्ड बनाउने आँट यसै खोलामा गरेका थियौं ।

उहिले उहिले ।

म गाई गोठालो पनि थिएँ, नाकमुनि जुँगा नउम्रँदै । तर एकदिन हामीले आमालाई धोका दियौं । गाई चराउन छाडेर बेपत्ता भयौं । सत्ताधारी दलका डन कार्यकर्ताले झैं घरको कानून तोड्यौं । त्यस दिन आमाले गोठालो गर्नु पर्‍यो । अरू टण्टा-लण्ठा त छँदैथियो ।

‘आईज मात्रै न, सुम्ला बस्ने गरी चुट्छुु’ आमाले भनेको यो हल्ला कानमा पर्‍यो । दिनभरि वाल मतलब राखिएन । सर्दुतिर लखरलखर घुमिराख्यौं ।

दिन ढल्नै लागेथ्यो । हाम्रो घरअघि दुई ठेउके मैलो तिघ्रा देखाएर टङरङ्ग उभिएका थिए । त्यसमा एउटा सानो डन भइखाको भाइ अशोक थियो । अर्काे, ठूलो डन हुन लागिपरेको म स्वयम् थिएँ ।

घरको तगारो सरक्क खोल्यौं, बिरालोको चालमा । लगाएको कमिजको फेरो कम्मरमाथि उठाएका थियौं, नाइटो टल्किने गरी । उचालेको कमिजबाट खाँदीखाँदी ल्याएको सिमेसाग चियाउँदै थियो । दाजुभाइको जोड्दा आधा डोको जति आएछ !

आमा र बहिनी घर पछिल्तिर टमाटरबारीमा पानी हाल्दै रहेछन् । हाम्रो आगमनको गन्ध पाउनासाथ आमाको कर्कश आवाज खस्यो । तत्क्षण सिमेसागको मुठामा आमाको नजर पर्‍यो । त्यसले आमाको रीस एकसय बत्तीस केभीबाट स्वाट्टै सय वाटमा खसाल्यो । त्यसैमा हाम्रो दशा टर्‍यो । दुगुर्दै दुवैले सिमेसाग भान्सा कोठामा नाङ्लामाथि फ्यात्त बिसायौं । सर्दुखोलाबाट शुरू भएको ठेउकेहरूको एक जोर नाइटो प्रदर्शनी त्यहीं टुंगियो ।

२०२९ सालतिरको एउटा पारिलो हिउँदे दिन ।

यो देशको एउटा कक्षा-२ मा एक नवप्रवेशी छिर्‍यो । त्यो म थिएँ । ६ वर्ष टेकेको उमेर मसँग थियो । चारकोसे वनमा वैशाखतिर पलाएको हरहराउँदो सालको पात जस्तो ।
शायद बुबा लाहुरमा भएकोले त्यो कलिलो उमेरमै मैले अलि बढी स्वाधीनता हात पारिसकेको थिएँ । खास कुरा, म सल्किएको एउटा साथीकहाँ मेरो रासोबासो बढ्न थालेको थियो । शिवमार्गतिर थियो उसको घर । ऊ थियो, भक्तेउर्फ भक्तबहादुर थापा । भर्खर भारत नागालैण्डबाट धरान आइपुगेको म । हरेक ठाउँ, हरेक मान्छे अपरिचित थिए । चिसो अपरिचित आँखाले मलाई हेर्थे । भक्तेसँग न्यानो आँखा रहेछ । उसैको सौजन्यमा स्कूलको पहिलो दिन ऊसँगै ढेस्सिएर बस्ने बेन्ची जो मैले पाएथें । लगत्तैपछि सर्दुखोला छिर्ने मौका उसैबाट पाएथें ।

गुलाबी र सिलाबरे रंगको भित्तो थियो सर्दुखोला पारि । परैबाट अब्स्ट्रयाक आर्ट जस्तो देखिने पहिरोमा । कमेरो माटोको खानी रहेछ । तिनताका धरानमा तखते टाँडे घरहरू छ्यापछ्याप्ती थिए । बिहाबारी वा चाडपर्व घरलाई कमेरो दल्न आए जस्तो हुन्थ्यो । काठे घरहरूले काँचुली फेर्थे । अचेल मुनालचोक भनिने म बसेको एरिया त्यतिबेलासम्म कम्तियाटोल नामले चिनिन्थ्यो । त्यो टोलमा झुरूप्प एक हुल घरहरू थिए । तर सप्पै तख्ते ।

कमेरो लिन सर्दुखोला धाउँदा मस्तको दूरी तय गथ्र्यौं । दुईखुट्टे गाडी छुट्थ्यो, भक्तेको घरबाट । भक्तेकै पछि लागेर । दुर्गाचोक र मंगलबारे बजार छोडेपछि आउँथे, ठूलठूला चउर र मकैबारी ! त्यसपछि हेरिरहुँ लाग्ने धानखेत । खेतमा धान र आलीमा मास झ्याङ्गएिका हुन्थे । गाउन सिपालु गाइने चराले गीत थप्थे । ठाउँठाउँ सालका तन्नेरी रूख तनक्क उभिएका थिए, हामीलाई सियाल ओताउँला झैं गरेर । गीत गाउँदै सर्दु र खोला पारिसम्म पुग्थ्यौं । सुसेल्न, सिठ्ठी मार्न मैले त्यही बाटामा सिकेथें । हराएको साथी खोज्नदेखि गीतको लय हाल्न नसिकी भएन ।

सर्दुमा उत्रेपछि दिनभरिको संगत कमेरोसँग हुन्थ्यो । आकार दिने र बिगार्ने लत बस्यो । उहिले उहिले इटालीमा मूर्तिकार माइकल एन्जेलो थिए भन्ने त्यसबेलासम्म थाहै थिएन । उनको बाल संस्करणमा म दर्ता भएँ । धराने एन्जेलोका कोमल हातबाट कहिले घोडा, कुकुर बने । कहिले घर, गाडी बने । कहिले बा-आमा बने । त्यो विगतलाई वर्तमानसँग दाँज्दा लाग्छ, म हुनुपर्ने ‘मूर्तिकार’ थियो । र नहुनुपर्ने ‘लेखक र सरकारी जागीरे’ थियो । आखिर नहुनुपर्ने भयो । शायद यसैको नाम ‘जिन्दगी’ होला ।

तीसको दशकतिर धरानमा स्वीमिङपुल किम्बदन्ती जस्तो थियो । सिनेमाको पर्दामा मात्र देखेथ्यौं । यसै पनि घोपा क्याम्प धरानमा बेलायतको टापु थियो । यसै पनि हामी ‘मेङ्गो पिपुल’ थियो ! यसैले हाम्रा लागि त्यो वर्जित क्षेत्र थियो । तर पनि गोरागोरीका लागि स्वीमिङपुल घोपा क्याम्पमा छ भन्ने हल्ला हाम्रो कानमा पुरानो भइसकेको थियो । सर्वहारा केटाकेटीका लागि सर्दुखोला नै काफी थियो । सर्दुखोलाबाट तानिएका कुलो कुलेसामा र खोलामा ठाउँठाउँ निःशुल्क साइटहरू थिए- छप्ल्याङ्ग छप्ल्याङ्ग पौडिनलाई । घर वा स्कूलबाट भागेका हामी भगौडाहरूको घण्टौंघण्ट जलवास त्यस्ता कुण्डहरूमा हुन्थ्यो । पढ्न स्कूल गा’को छोरो दिनभरि आहाल बसेको आमाले थाहै नपाउने सुविधा प्राप्त थियो ।

यतिखेर मलाई एउटा दिङ्गदिङ्गे सम्झनाले पछ्याइरहेछ । त्यस्ता जलकुण्डहरूमा हाम्रो मात्रै हकदाबी थिएन । लोकल भैंसीहरू अटेरी मोही जस्ता थिए । भैंसी बथान हाम्रो परवाह नगर्ने । हामी उनीहरूको परवाह नगर्ने । भैंसीको खराबी- डाइपर नलाउने ! गोब्य्राउँदा पौडीकुण्ड हरियो भरियो बनाइदिने ! र पनि हामी चाहिं कुण्ड त्याग नगर्ने ! बरू बेलुकी घर फर्किंदा गोबर गन्हाएको जीउसहित फर्किने । त्यतिन्जेलसम्म भुइँका हामी जस्ता भुराभारेका लागि नुहाउने साबुन सहज भइसकेको थिएन ।

सर्दुमा गँगटाको बस्ती बाक्लिएको रहेछ ! गँगटा खान हामीलाई त्यही खोलाले सिकायो । दिनभरि खोलामा समय गुजार्दा भोक लाग्ने पेट कहिल्यै घरमै छोड्न मिलेन । खाजा खाने उपाय थिएन । एकदिन एउटा जुल्फे दाइले मलाई सिकाउने भयो- ‘याँ हात छिरा…मु… !’

मलाई ‘भल्गर’ बनाइदियो । म डराएको देखेर उसमा रीस चढिसकेथ्यो । ‘के जोखाना हेर्छस्, तेरो बाउलाई दुलाबाट निकाल !’ नभन्दै हात हालेको थिएँ, कसैले अँठ्याए जस्तो भो । फुत्त हात निकालें । बडेमानको गँगटो मेरो औंलासँग ‘टु-इन-वान’ भएर आयो । मेरो औंला उसको दाह्राभित्र भेटाएँ । रगत चुहिरहेको औंला त्यहाँ देखें । म बाल शिकारी रुनकराउन लागें । कसोकसो झट्कार्दा औंला फुत्कियो । रगतपच्छे भएँ । गँगटोसँगको मेरो पहिलो भेटघाट सुखद भएन ।

त्यसपछिका दिनहरू फेरिए । गँगटोको जानी दुश्मन नम्बर एकमा मेरो नाम उक्लियो । मलाई कुशल शिकारी ठानियो । कुलकुल बग्दै गरेको पानीको गन्धबाटै एक्सरे गर्थें, कहाँ गँगटाको बास छ, छैन भन्ने । मलाई बेलाबेलामा गोद्ने टोले भिलेनहरू गैंडे, चुरसे, राई कान्छा जस्ता सिनियरहरू थिए । तर गँगटो मामिलामा तिनीहरू मेरो शिष्य बने । मैले अह्राउने खटाउने भएँ । गँगटा शिकारीको यो अवतार हाईस्कूल नपुगुन्जेल मलाई खूबै फाप्यो ।

‘इण्डिया’ सुन्नासाथ दिमागमा रेल कुदेर आउने ! यस्तो छ, अझै हाम्रो मनोविज्ञान । हुन पनि मोहनदास करमचन्द गान्धीलाई दक्षिण अफ्रिकामा रेलको फस्र्ट क्लास डिब्बाबाट नघोक्र्याएको भए महात्मा गान्धी नै हुन्थेनन् कि ! यसैले इण्डियाको स्वाधीनतामा रेल गाँसिएको छ ।

रेल नचढे नि हेर्नलाई धरानमा एउटा लिक थियो । लिकै लिक हिंड्न हामीले जोगबनी धाउनु परेन । धरानको रत्नचोक कटेपछि चतरातिर लाग्दा धरानको सुदूरपश्चिम किनारामा रेल्वेलाइन सही साबुत थियो । एकापट्टी सर्दुखोलातिर छिरेको, अर्कोपट्टी चारकोसे जङ्गल चिरेको । कोशी व्यारेज बनाउँदा धरानबाट ढुंगा ओसार्न लिक ओछ्याइएको सुनेथें, बूढापाकाबाट । त्यस ठाउँको नाउँ रेल्वेलाइन भए नि त्यो लाइन अलि पछि हेर्दाहेर्दै उखेलेर खाए, एकथरीले ।

कोलम्बसले अमेरिका खोज्न हिंडे जस्तै हामी पनि हिंड्थ्यौं । औंसीपूर्णेमा लिकैलिक । नौलो ठाउँ हेर्न खोज्ने बाल हठले । ‘सबै बाटो रोममा पुगेर टुंगिन्छ’ भने जस्तो जताबाट गए नि पुगिने गन्तव्य फेरि त्यही सर्दुखोला हुन्थ्यो । धरान-चतरा मार्गपट्टी सर्दुखोलाको पुछारतिर पुगेर लिक टक्क अडिन्थ्यो ।

एकपल्ट मेरो भेजा खराब भो । लिकैलिक गयौं र सर्दुखोला पुग्यौं । त्यहाँसम्म ठीकै थियो । तर फिर्ने बेलामा रेलझैं दौड्ने भूत सवार भो । स्पेनिस उपन्यासको पात्र ‘डन कि होते’ जस्तो बेवकूफ र दुस्साहसी भएँ म । गएका भाइहरू ‘सान्चो पान्जा’ जस्ता पिछलग्गु भए ।

‘डन कि होते’लाई झैं मलाई लाग्यो, रेलको इन्जिन स्टार्ट भइसक्यो । धुवाँ छोड्न थालिसक्यो । टिटीले सिट्टी फुकिसक्यो । रेलको पुलिस उक्लिंदै ढोका लगाउन थालिसक्यो । अब मेरो मात्र काम बाँकी रहृयो । मलाई लाग्यो म नै हुँ, रेलको हेड पाइलट । कुदाउन थालें- छुक्छुक्छुक् छुक्छुक्छुक् गर्दै ओठबाट । पन्” मिनेटसम्म त मेरा पछि लागेका भाइहरू दौड्दै थिए । फतक्क गलेछन् । लिकमाथि थुचुक्क बसेछन् । ‘सान्चो पान्जा’ विना म एकोहोरो कुदेको कुद्यै थिएँ । परपरसम्म बस्ती देखिएन । ताप्रेघारी र घाँसेमैदान देखिन्थ्यो । ताप्रेका बीउ बोटैमा सुकेर हावाले हल्लाउँदा पनि सल्र्याङ सल्र्याङ बज्ने भइसकेका थिए । हिउँदको सुक्खायाम जो थियो । एकाएक के भो ? मैले थाहा पाउँदा उत्तानो पाएँ आफूलाई चउरमा । ममाथि नीलो आकाश खनिएको थियो । आकाशमा केही टुक्रा बादल थिए । आखिर ‘डन कि होते’ को नियति नै हो, सधैं मार खाने, भ्यागुतो झैं पछारिने ।

मेरो खुट्टाको बूढीऔंलो बगिरहेको रगतको माझमा थियो । एकछिनपछि मात्र थाहा पाएँ, मेरो ओठ फुकेको बेलुन जस्तो सुन्निएको । जिब्रोमा अमिलो-अमिलो स्वाद भरिएको । ओठ फुटेर रगतको अर्को धारो पँधेरो झैं बग्दै रहेछ । त्यो दिन भाइहरू बटुलेर जसोतसो घर पुगें । भाइहरूलाई बाटामा अपराधी मुद्रामा थर्काएँ, रगत बगिरहेको थुतुनो फ्याउ फ्याउ बजाउँदै । आमालाई सुनाएमा रामधुलाइ गर्ने धम्की थियो त्यो । किनकि आमाबाट मैले रामधुलाइ खाने डर मेरो वरिपरि हिंडिरहेको थियो ।

त्यो दिन पनि अँध्यारो खस्यो । खरायो चालमा मैले घरको दैलो टेकें । घाइते भएको घटना आमाबाट जो छिपाउनु थियो । अलिकति भरथेग त्यतिन्जेल नजोडेको बिजुली बत्तीको थियो । लाल्टिनको मधुरो उज्यालोमा घाइते शरीर लुकाउन सजिलो भो । भोलिपल्ट बिहान बिउँझिंदा त पहाड खसिसकेछ मैमाथि । ओठ सुन्निएर बजरंगबली अवतार देखें आफ्नो । अब कहाँ लगेर आमाबाट यो अनुहार लुकाउने ? केही नलागेर सरेण्डर गरें । डराई-डराई सबै कहानी बकें । कुटाइ नखान लय हालीहाली रोएँ । ‘मलाई कहिल्यै सुख नदिने भइस्, गोरु’ भन्दै आधा घण्टा जति दुई-चार क्विन्टल गाली खाएँ । अनुहार बिगि्रसकेकोले होला त्यस बिहान आममाफी पाएँ । आमाले घिच्याउँदै भित्र लैजानुभो । नून र तातोपानीले सेकताप गर्नुभो । स्कूल जाने चेहेरा बनाउन अरू केही दिन कुर्नु पर्‍यो । अण्डरग्राउण्ड नेता जस्तो बल्ल ओभरग्राउण्ड भइयो ।

किशोर वयमा नौ-दश क्लास उक्लें । ज्यानमा उमेरले बैंसको जमरा उमार्न थालेको थियो । सके ‘लभ’ गरिहाल्ने र नसके पनि उट्पट्याङ गर्ने उपद्रो बढ्यो । एक दुइटा मेरा चिनारुहरू असफल प्रेमपत्र लेखकको वर्गमा वर्गीकृत भइसकेको देख्थें । बाटो हिंड्दा छेउकुना लागेर हिंड्थे । कसैले बोलाए पनि बोल्न चाहन्नथें ।

०००

एकरातको कुरा ।

शिव सिनेमा हलमा फिल्म ‘हम किसी से कम नहीं’ लागेको थियो । नाइट-शो हेरेर निस्कँदै थियौं । मूलगेटमा आँखा पर्‍यो, खितखिताउँदै निक्लिरहेको एक किशोर जोडीमाथि । सहपाठी केटीलाई चिनिहालियो । केटो कहिल्यै नदेखिएको थोरै छिप्पिएको दाउरे ज्यानको थियो । पछि लाग्यौं । सँगै पढ्ने तोया र म संलग्न थियौं यो गन्दा मामिलामा । उनीहरू चतरालाइनतिर मोडिए । फेरि जनपथतिर मोडिए । त्यहाँबाट सर्दुखोलातिर मोडिए । त्यतिन्जेलसम्म करीब नौ बजेको थियो क्यार !

त्यो बेला ‘लाइट’ विहीन सडक थिए । अँध्यारो बाटाको फाइदा अलिकति उनीहरूले र अलिकति हामीले उठाइरहेका थियौं । हिंड्दाहिंड्दै त्यो जोडी सर्दुखोला छेउको पारिलो खेत-खलिहानतिर पस्यो । हामी भूत शैलीमा पछ्याइरहेका थियौं । त्यसताका सिमलीघारीले छेकेका कुलो-पैनी थिए । एकाएक के भो ? ती हाम्रो राडारबाट हराए । छान मार्‍यौं । अन्ततः रित्तो फिर्‍यौं । रात्रिकालीन डेटिङ गर्न हिँडेको त्यो प्रेमिल जोडीलाई सर्दुखोलासम्म हामीले किन पछ्यायौं ? ती कहाँ अल्पिए ? सम्झँदा अहिलेसम्म आफूलाई गाली गर्न छाडेको छैन । त्यो रात अर्काको निजी जीवनमा चियाउने ‘पिपिङ टम’ को असफल भूमिका खेलेकोमा !

कक्षाकोठामा त्यो केटीसँग पछिसम्म देखभेट जारी नै रहृयो । तर किन हो, ‘त्यो रात कहाँ गएकी थियौ ?’ मेरो मुखबाट वाक्य फुटेन । बरू हामीले पछ्याएको उसले थाहा पाएकी थिई कि भन्ने डरले मलाई झ्याप्प छोप्थ्यो । त्यो डरको मारे उसको सामु टिक्न दिन्नथ्यो । पोहोर साल ऊसँग एकाएक धरानमा भेट भो । थाहा पाउन धेरै बेर कुर्नै परेन, हजुरआमाको पहिचान उसँग थियो । नातिनी बोकेर ऊ जो इभिनिङ वाक्मा थिई । त्यो दाउरे केटाको केही भेउ पाउन सकिनँ । ऊ को थियो ?

त्यो उमेरको स्वादै अर्को ! जाडोको याम महीनैपिच्छे आइदेओस् जस्तो लाग्थ्यो । पिकनिक जाने सिजन त्यसले ल्याउँथ्यो । एकपटक व्यग्रताका साथ पर्खेको त्यो सिजन नआउँदै एकाध महीना अघिबाटै हामीबीच हल्लाखल्ला मच्चिसकेथ्यो । टोलमा अमराइट र डण्डीबियो खेल्न छाड्यौं । कानेखुसीमा रमाउन थाल्यौं । पिकनिक कहिले जाने, कसरी जाने ? पैसाको दुःख थिएन । भर्खर तिहारमा खेलेको देउसी-भैलो थियो । पकेट पकेटमा दक्षिणा बाँडेको सय-पचास रुपैयाँ आलै थियो ।

बहुप्रतीक्षित पिकनिक जाने त्यो दिन पनि आयो । दुई-तीन दिन अघिबाटै कस्तो लुगा लगाउने सल्लाह बनिसकेको थियो । अरू बेला सात बजेसम्म निदाए नि त्यो दिन झिसमिसै चिरिच्याँट्ट पर्‍यौं । टोलबाट लाइन लागेर हिंड्यो टोली । कसैले थाप्लामा तरकारी । कसैका काँधमा दाल चामल । म ठेउकेका भागमा पकाउने तुल्याउने भाँडाकुँडा परेछ । एउटा सिलाबरे भाँडोचाहिं श्रीपेच लगाएर मार्चपास गरिरहेथें । त्यो श्रीपेच मेरो अधिकारमा पथ्र्यो । किनकि म टोली नेता पनि थिएँ ।

त्यो दिन बाटाभरि एउटाले भूतको कथा हाल्यो । सुन्दैसुन्दै सर्दु पुग्यौं । कालीखोला छेउछाउको साइट छान्यौं । जङ्गल पसेर झिक्रा दाउरा बटुल्यौं । पकवान बनाउने काम शुरू भो । मेरो दक्षता अनुसार गँगटा पक्रन तिनको गुँडतिर व्यस्तिएँ । कतिपय नुहाउन छिरेका थिए । घाम टाउकामाथि डुल्दै थियो । घडीले करीब करीब बाह्र बजाएको हुनुपर्छ ।

एकाएक उँभो चढेको टोली चिच्याउँदै झर्‍यो । हेरें, भाइ अशोक अघिअघि थियो । भएजति लड्दै उठ्दै दौड्दै हामी भएतिर ओह्रालो झरिरहेका थिए । के भन्ने मेसो नपाउँदै सुनें- ‘भूत, भूत, भूत !’ भूतको कथा बच्चैबाट सुन्दै आएको थिएँ । सर्दुखोलामा बाह्र बजे दिउँसो भूत घुम्न निस्कन्छ, त्यो पनि सुनेको थिएँ । ‘लौ, आज हाम्लाई नै फेला पारेछ’ भन्ने भो । ओठ-तालु सुक्यो । सबैको जेठो-बाठो भनेको मेरो त त्यो गति भो भनेपछि अरूको के कुरा गर्नु ! म पनि भाग्न थालें । आधा घण्टा जति सर्दुखोलाबाट कुदे्को कुद्यै भएछौं । कति पटक लड्यौं, कति ढुंगामा ठोकियौं अडिट गरिसाध्य भएन । जसोतसो घर पुग्यौं ।

कहाँ गयो सर्दुको हरियाली ! कहाँ गए सर्दु छेउछाउका खेत-खलिहान ! कहाँ गयो कालीखोला ! कहाँ गए मडारिएर बग्ने र हामीलाई पौडी खेल्न दिने ती कुलो पैनी ? कहाँ गए कोशीको बाँध बनाउँदा जोडेका ती रेल्वे लाइन ?

त्यसदिन पिकनिक त भाँडियो भाँडियो, भाँडाकुँडा र सर्दाम पनि त्यतै छुट्यो । पकाउन बसाएको परिकार चम्कोमै पाकिरहेको थियो । बसाउन तयारी हालतमा राखिएको सर्दाम जहींको तहीं रहृयो । पछिसम्म भूतसँग साक्षात्कार गर्ने टोलीलाई मैले सोधिराखें, ‘आखिर कस्तो थियो, त्यो भूत ?’ कसैले बताएनन्, त्यो । अहिलेको जस्तो हातहातमा मोबाइल भएको भए फोटो खिच्थे कि ! त्यो भूतको हुलिया पत्ता लाग्थ्यो कि ! स्त्रीलिङ्गी वा पुलिङ्गी वा तेस्रोलिङ्गी के थियो ? रहस्य रहस्यमै रहृयो ! त्यो दिन पिकनिक त बिथोलियो बिथोलियो, धेरै समयसम्म हामीमध्येको धेरैको घरमा फुकफाक चलिरहृयो, वन झाँक्री लाग्यो भनेर । किनकि हामीमध्ये कतिपयलाई विना कारण टोलाउने गरेको आरोप लागेको थियो ।

हाम्रो कम्तिया टोल नजिकै चतरालाइनबाट जनपथलाइन जाने मोड पर्थ्यो। गर्मी लागेपछि किन हो बेलुका शोरशराबा मच्चिन्थ्यो । एक साँझ ! घडीको काँटाले साढे-सात छुनछुन लागेको थियो । ‘चोर चोर चोर’ भन्दै फेरि मान्छे चिच्याउन थाले । गुरुरुरु दौडेको आवाज आयो । म चाकनचुकन बाह्र वर्ष पुगेको थिएँ । चुठेको मात्रै थिएँ । त्यो आवाजले मेरो इन्जिन स्टार्ट गरिदियो । म पनि तेस्रो चौथो हुँदै पाँचौं गियरमा दौड्न थालें । हल्ला मच्चिएतिर ।

बत्ती छैन । बीस-बाईस फिट पर्तिर केही देखिन्न । नजिकको मान्छे चिनिन्न । तर पनि मान्छे कुदिरहेका थिए । चोर को र कता थियो तर सबैलाई ऊ चाहिएको थियो । हुलका हुल मान्छे जतातिर दौड्दै थिए मपनि त्यतैतिर लागें । त्यो भीड उही सर्दुखोलातिर सोझिएको थियो ।

दौड्दा दौड्दै म गलें । आवाज सुस्तायो । अघिल्तिर पछिल्तिर कतै चोर पक्रिनेको छायाँ पनि देखिएन । आफूलाई एक्लो पाएर डर-डर पनि लाग्यो । त्यति नै बेला कसैले बोलाएको सुनें- ‘ओए केटा, यता आइज !’ आवाज आएतिर हेर्ने प्रयास गरें । थुपारेको मकैको ढोड उभिएको पाएँ । त्यसको ओटमा भुइँमा टुक्रुक बसे जस्तो आकृति देखें, जूनको डिमलाइटमा । ऊसम्म नपुग्दै ऊ जुरूक्क उठ्यो । मलाई बिजुली गतिमा दुई झापड हान्यो- चड्याम चड्याम । फोहोर शब्द ओकल्दै गर्जियो- ‘भाग यहाँबाट !’ छुलछुली छोड्दै म बेपत्तासँग भागें ।

मेरो इन्जिन घरटोलमा आएर बल्ल ‘अफ’ भो । बत्तीमा हेर्दा दायाँ गालामा दुई वटा र बायाँ गालामा तीन वटा औंलाको छाप रहेछ । त्यो डाम गालाबाट मेटाउन अर्को दुई-चार दिन लाग्यो । ‘त्यो लुकेको मान्छे को थियो ? ममाथि केको रीस घोप्टायो ?’ यस्ता कौतूहलताले धेरै पछिसम्म मेरो मनमा प्वाल पारिराख्यो । तर मैले कहिल्यै चित्तबुझ्दो जवाफ भेटिनँ ।

बरू झापड खाएको भोलिपल्ट चोरीको थप जानकारी मिल्यो । चोर जो भए नि चोरी वारदात एउटा चियापसलमा भएको रहेछ । भात फत्काएको भाँडो बोकेर चोरले टाप कसेको रहेछ । भातको भाँडो भोलिपल्ट तोरीबारीमा फेला परेछ । तर चोरको पेट भरिए नभरिएको थाहा लागेन । हालाँ कि त्यो रात विना क्षतिपूर्ति अघाउन्जेली झापड मैले खाएँ ।

दिव्य चार दशक बितेपछि अहिले देख्छु, सर्दु सर्दु जस्तो छैन । धरानले किन हर्‍यो सर्दुको सौन्दर्य ? के धरान छेउबाट बग्नु उसको अपराध थियो ? सर्दुले धरानलाई सिंगार्‍यो । बदलामा सर्दुमाथि लुटपाट मच्चियो । हुँदाहुँदा धरानलाई पानी पिलाउने सर्दुखोला जलाधार क्षेत्र समेत लुटिएको महाभारत सुनिन्छ । दूध चुसाएकी आफ्नी आमाको चीरहरण धन पिपासु सन्तानले गरे जस्तो !

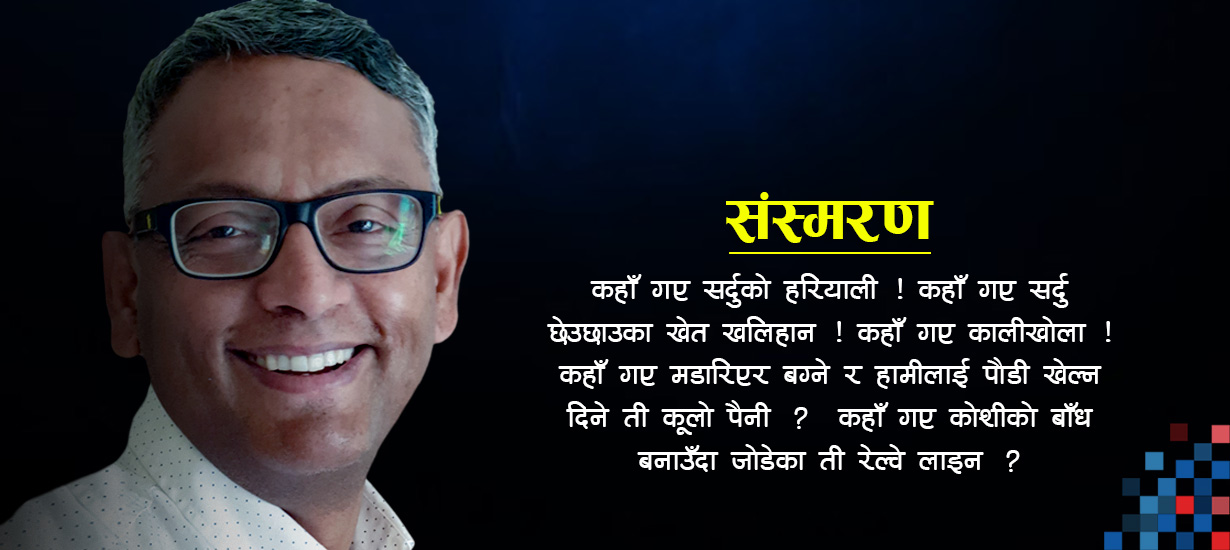
कहाँ गयो सर्दुको त्यो हरियाली ! कहाँ गए सर्दु छेउछाउका खेत खलिहान ! कहाँ गयो कालीखोला, कहाँ गए मडारिएर बग्ने र हामीलाई पौडी खेल्न दिने ती कुलो पैनी ? कहाँ गए कोशीको बाँध बनाउँदा जोडेका ती रेल्वे लाइन ?

अहिले सर्दु हैसियत बिग्रेको खोला भएर अधमरो बाँचेको छ । यदि जग्गा दलाल र माफियाको भरमा छोडेर शहर सुन्दर र सभ्य बन्ने भए यूरोपको राइन र साइन नदी किनारामा पेरिस र म पहिलोपल्ट पढ्न बसेको रोटरड्याम जस्ता मानक शहर कसरी हुर्कन्थे ? यदि सुकुम्बासी बसाल्ने रणनीति चुनाव जित्ने सदाबहार उपाय हुने भए लसएन्जलस र जेनेभा शहरमा सुकुम्बासी बस्ती किन बसालिएन । यत्ति नबुझेको अभिनय र जिद्दी धरानले र यो देशले नगरोस् भन्छु, म ।

RHEL7 - Mount filesystem with selinux enabled content

 
Got following error while trying to mount the filesystem.

After mounting the disk the listed below problem appears.

root# mount -v /dev/vg1/lv_ssd /mnt/backup
mount: /home/ssd does not contain SELinux labels.
You just mounted an file system that supports labels which does not
contain labels, onto an SELinux box. It is likely that confined
applications will generate AVC messages and not be allowed access to
this file system. For more details see restorecon(8) and mount(8).
mount: /dev/vg1/lv_ssd mounted on /home/ssd.
root#


Tried the solution below, didn't work,
# semanage fcontext -a -s system_u /home/ssd
# cat /etc/selinux/targeted/contexts/files/file_contexts.local

still no change,
# ls -lZ /home/ssd

Tried,
# restorecon -vF /home/ssd

# ls -lZ /home/ssd
Still, didn't work

Tried again,
# restorecon -R /home/ssd 

didn't work,
# restorecon -Rv /home/ssd 

finally ran systemctl daemon-reload and remounted, it simply worked.

In fact fstab entries are converted to systemd units, so you have to run systemctl daemon-reload and try to mount again.

Monday, June 28, 2021

Host inventory

 Host inventory


Hostname    Model/architecture    Purpose    Operating System    CPU(Cores)    Mem/RAM    HBA    Current Firmware      Serial Number     iLO

lxweb243    HPE DL580 Gen10    Database/Query Server    RHEL8.x    88     4096    HPE SN1600Q    SPP 2021.04.1    MXQ7833474747    iLO 5.2.42

STIG finding - JAVA Vulnerability remediation

 Remediate JAVA vulnerability
- Remove oracle JDKs and JREs from /data/apps/java
- Remove IRacle JDKs and JREs from Lmod
- Remove IBM JDKs and JRE under /data/apps/java
- Remove IBM JDKs and JREs from Lmod
- Remove old unsupported locally installed Oracle JDKs and JREs.
- Since Oracle JAVA is not free for commercial use, install RedHat supported and IBM provided JAVA and JDK/or JREs.


1. Check installed JAVA software
# rpm -qa | egrep "java|jdk" | sort
# yum erase java-1.6.0-openjdk java-1.7.0-openjdk java-1.7.0-openjdk-headless
2. Installed IBM JAVA
# yum install java-1.8.0-ibm java-1.8.0-ibm-devel java-1.8.0-openjdk java-1.8.0-openjdk-devel java-11-openjdk java-11-openjdk-devel


RHEL7 - Puppet agent update

 Puppet agent update from 6.22 to 6.23

1. Repo clean
$ ansible -i host-list all -a "yum clean all" -b -K

2. Install/update package
$ ansible -i host-list all -m yum -a "name=puppet-agent-6.23.0-1.el17.x86_64 state=present" -b -K

3. Verify
$ ansible 0i host-list all -o -a "rpm -q puppet-agent" | sort

4. Run aide audit
$ ansible -i host-list all -a "aide --init" -b -K

5. Verify file is created
$ ansible -i host-list all -o -a "ls -l /var/lib/aide/aide.db.new.gz" -b -K | sort

6. Copy new file and overwrite the old one.
$ ansible -i host-list all -a "cp -av /var/lib/aide/aide.db.new.gz /var/lib/aide.db.gz"

Verify
$ ansible -i host-list all -o -a "rpm -q puppet-agent" | sort

Friday, June 25, 2021

यस्तो पनि हुँदो रैछ - Yasto Pani Hudo Raichha

Yasto Pani Hudo Raichha (यस्तो पनि हुँदो रैछ) Phatteman Lyrics by Yadav Kharel Composed by Nati Kaji Lyrics: शब्दः यादव खरेल संगीतः नातिकाजी मूल गायकः फत्तेमान पलेँटीमाः फत्तेमान यस्तो पनि हुँदो रैछ जिन्दगीमा कैले–कैले कसैलाई माया गर्नु एउटा भूल गरँे मैले यस्तो पनि हुँदो रैछ मेरो जस्तो माया दिने तिमीलाई हजार होलान् तिम्रो लागि मेरो जस्तो हजार–हजार मुटु रोलान् जसलाई आफ्नो सम्झेको थेँ, उही बिरानो भयो अहिले कसैलाई माया गर्नु एउटा भूल गरेँ मैले मेरो माया कुल्ची जाने तिम्रो माया फलोस् फुलोस् मेरो इच्छा मारी जाने तिम्रो इच्छा सधैँ पुगोस् उदास आँखा मेरा पनि सपना देख्थे पहिले–पहिले कसैलाई माया गर्नु एउटा भूल गरँे मैले Shabdah yadav kharel Sangitah natikaji Mul gayakah phattemana Palentima phattemana Yasto pani hundo raichha jindagima kaile–kaile Kasailai maya garnu euta bhul garane maile Yasto pani hundo raichha Mero jasto maya dine timilai hajar holan Timro lagi mero jasto hajara–hajar mutu rolan Jaslai aaphno samjheko the, uhi birano bhayo ahile Kasailai maya garnu euta bhul gare maile Mero maya kulchi jane timro maya phalos phulos Mero ichchha mari jane timro ichchha sadhai pugos Udas aankha mera pani sapana dekhthe pahile–pahile Kasailai maya garnu euta bhul garane maile Translated Lyrics: So it can happen in life thus To love somebody was a mistake to trust So it can happen in life thus Thousands of them could shower you with love like I do Many more of them would cry their hearts out for you I am estranged by the one I trusted was mine to remain To love somebody was a mistake to retain You stamped upon my love may yours flower and blossom You killed my love desires may yours be forever fulfilled Once they used to see dreams these sad eyes of mine To love somebody was a big mistake now I find


https://www.youtube.com/watch?v=fUebAVu-Pcw 

मर्न बरु गार्हो हुन्न - Marna Baru Garho Hunna

 Marna Baru Garho Hunna (मर्न बरु गार्हो हुन्न) Phatteman Lyrics by Tirtharaj Tuladhar Composed by Nati Kaji Lyrics: मर्न बरु गाह्रो हुन्न, तिम्रो माया मार्नै सकिन्नँ बसन्तको हरियाली फूलसँगै ओइली जान्छ निलो भुइँको सेतो बादल हावासँगै उडी जान्छ तर तिम्रो न्यानो माया अझै पनि न्यानो नै छ तिम्रो माया मार्नै सकिनँ मर्न बरु गाह्रो हुन्न, मर्न बरु गाह्रो हुन्न, तिम्रो माया मार्नै सकिनँ धेरै लामो बाटो हामी, सँगैसँगै हिडिँसक्यौं टाढा टाढा कता कता हामी दुबै पुगिसक्यौं तर अन्त्य यसको यहीँ भन्न अझै मनै भएन तिम्रो माया मार्नै सकिन्नँ मर्न बरु गाह्रो हुन्न, मर्न बरु गाह्रो हुन्न, तिम्रो माया मार्नै सकिन्नँ Marna baru gahro hunna, Timro maya marnai sakinnan Basantako hariyali phulasangai oili janchha Nilo bhuiko seto badal hawasangai udi janchha Tara timro nyano maya ajhai pani nyano nai chha Timro maya marnai sakinan Marna baru gahro hunna, Marna baru gahro hunna, Timro maya marnai sakinan Dherai lamo bato hami, sangaisangai hidinsakyau Tadha tadha kata kata hami dubai pugisakyau Tara antya yasko yahi bhanna ajhai manai bhaena Timro maya marnai sakinnan Marna baru gahro hunna, Marna baru gahro hunna, Timro maya marnai sakinnan

पोखिएर घामको झुल्का

पोखिएर घामको झुल्का, भरि संघारमा,
तिम्रो जिन्दगीको ढोका (खोलूँ खोलूँ लाग्छ है)2
सयपत्री फूलसितै फक्री आँगनमा,
बतासको भाखा टिपी (बोलूँ बोलूँ लाग्छ है)2

(कति कति आँखाहरु बाटो छेक्न आँउछन्)2
परेलीमा बास माग्न कति आँखा धाँउछन्
यति धेरै मानिसका यति धेरै आँखाहरु,
मलाई भने तिम्रै आँखा (रोजूँ रोजूँ लाग्छ है)2

(उडुँ-उडुँ लाग्छ किन, प्वाँख कहिले पलायो)2
मनको शान्त तलाउको पानी कसले चलायो
आँफैंलाई थाहा छैन कसलाई थाहा होला,
त्यसैले त तिमीसित (सोधूँ सोधूँ लाग्छ है)2

पोखिएर घामको झुल्का, भरि संघारमा,
तिम्रो जिन्दगीको ढोका (खोलूँ खोलूँ लाग्छ है)2

Pokhiyera Gham Ko Jhulka.....
Singer: Narayan Gopal
Music: Ambar Gurung
Lyrics: Haribhakta Katuwal

Thursday, June 24, 2021

RHEL7 - using rsync

 #!/bin/bash
#####
# rsync
#
rsync -azvH --delete -e "ssh -o StrictHostKeyChacking=no -o UserKnownHostsFile=/dev/null" jay@lx34web.ent.local:/opt/apps/pvccn /data/apps

rsync -azvH --delete -e "ssh -o StrictHostKeyChacking=no -o UserKnownHostsFile=/dev/null" jay@lx34web.ent.local:/software/tools /data/software

Gitlab update from version 13.x to 14.x

 # yum --enablerepo=epel update -y

* unicorn['worker_timeout'] has been deprecated since 13.10 and was removed in 14.0. Starting gitlab 14.0, unicorn is no longer supported and users must switch to Puma, following https://docs.gitlab.com/ee/administration/operations/puma.html

Solution
1. Edit the config file and change from unicorn to puma

# vi /etc/gitlab/gitlab.rb

2. and change the value from unicorn to puma

unicorn['worker_timeout'] to
puma['worker_timeout']

3. and run reconfigure command
# gitlab-ctl reconfigure


4. Again run the update command
# yum --enablerepo=epel update -y

You will be successful

Wednesday, June 16, 2021

K8S - playing with kubernetes

Worker node
- Container runtime
- kubelet - interacts with container and node. starts the pod with a container inside
- kube-proxy - Forwards the request

Master node interacts nodes
- schedule pod
- monitor
- reschedule


API-Server - cluster gateway, gets authentication
- validate request
- query request through api-server

scheduler
- say start a node
- intelligent enought to start the right resource on right node.
  - checks available resource, least busy, schedules the pod.

Controller Manager
- nodes dies, reschedule (detact cluster state change)
- restart pod

etcd
- keeps the state /changes stored in key/value pair
- its a database of resources
- keeps cluster state
- cluster health is kept in etcd cluster
- application is not stored here. it only stotes cluster state data.

api-server load balanced


Cluster set up
-> master - 2
-> nodes - 3

add new master/node server
- get new server
- install all master/worket node components
- join the cluster


Minikube ad kubectl

minikube
- you have master node
- worker nodes

to test on local node, setting whole infrascture is every difficult and time consuming.
so  you can use minikube
- use virtual box (minikube creates)
- node runs in the virtual box
- 1 node cluster
- used for testing purpose


what is kubectl?
- command line tool for k8s cluster

Minikube runs master process, which means
- it has API-server (enables interaction with cluster)
- use kubectl to interact
  - add,delete component
    create, destroy pods

kubectl works for minukube, cloud or any type of cluster.

Installation
- download mini-kube from kubeernetes.io site - just google
- Download virtual box and install it

for mac
- brew update
- brew install hyperkit

- brew install minikube
kubectl also installed.

@ kubectl
you will see output
$ minikube

you can do everything here on your system.

start the lcuster
$ minikube start

specify the
> minikube start --vm-driver=hyperkit

or virtualbox

minikube cluster is set up.  
# kc get nodes
gets the state of the node

its ready with master role
# minikube status
shows the status

you see kubelet, apiserver running

$ kubectl version
# alias kc=kubectl


Once you have minikube and kubectl installed, you can run and practice k8s.
Some kubectl commands
Create and debug pods in minikube cluster


CRUD commands
$ kc create deployment <name>    -> Create deployment
$ kc edit deployment <name>    -> Edit deployment
$ kc delete deployment <name>    -> Delete the deployment

Status of different k8s components
$ kc get nodes|pod|services|replicaset|deployment

Debugging pods
$ kc logs <pod_name>    -> Log to console
$ kc exec -it <pod_name> -- /bin/bash    # get interactive pod terminal


$ kc get nodes
$ kc get pods
$ kc get services

create pod
$ kc create -h
look for available commands

Note: pod is one of the smallest unit in k8s cluster.
we will not directly create pod but we will use deployment - an abstraction layer on top of pods.
so, we will create deployment as follow,
$ kc create deployment NAME --image=name-of-image [--dry-run] [options]

image=> container image
$ kc create deployment nginx-depl --image=nginx

$ kc create deployment mydep --image=nginx

$ kc get deployment
$ kc get pods
you get pod name with prefix of deployment

deployment has all the information to create POD so you can call deployment is a blueprint for creating pods
- most basic configuration needed for deployment to create pod is name and image to use to create pod.


There is another set of layer between POD and deployment, which is automatically managed by kubernetes deployment called replicaSet.

$ kc get replicaset

you will see the name of the replicaset and other info.

ReplicaSet basically manages the replicas (copy) of POD.

You don't have to manage or delete or update replicaset. You will directly work with deployment.

the above command creates one pod or one replica. If you want to create more replicas (copy of instance), you can specify with additional options.


Layers of abstraction

- Deployment manages a replicaSet
- ReplicaSet manages a POD and
- Pod is an abstraction of container

everything below deployment should be managed by kubernetes. You don't have to manage it.

You can edit the deployment for image, not on the pod. for eg,
$ kc edit deployment nginx-deploy

You will see auto generated configuration file with default values.

go down to spec and look under containers  you will see image

you can change the version here
--image: nginx:1.19

and save the change

$ kc get pods
now, you see old pod is terminating and new is creating with new image
$ kc get replicaset

you will see new replica set has one (current) and old has 0 pods.

Debugging POD
$ kc logs <name of pod>
$ kc create deployment mongo-dep1 --image=mongo
$ kc get pod
$ kc logs mongo-dep...

$ kc describe pod <pod_name>


check under message for status
$ kc get pod

$ kc logs mongo-dep... <pod-name>

if contianer has problem, you will see it

$ kc get pod

debugging
$ kc exec - gets the terminal
$ kc exec -it <pod-name> -- bin/bash

it mean interactive terminal
you get a termial of mongo db.

you can test and check logs


Delete pod

$ kc get deployment
$ kc get pod

To delete
$ kc delete deployment <name of deployment>

$ kc get pods

you see pods terminating
$ kc get replicaset

kc get replicaset
everything underneath deployment is gone.


$ kc create deployment name image option1 option2 ...

you can supply more value at the command but it will better to work on config file.


using k8s configuration file contains all needed information on file and execute.

to execute, you use apply comand

$ kc apply -f <name of config file>.yaml

$ vi nginx-deploy.yaml

apiVersion: apps/v1
kind: Deployment
metadata:
  name: nginx-deployment
  labels:
    app: nginx
# specification for deployment
spec:
  replicas: 1
  selector:
    matchLabels:
      app: nginx
# specification (blueprint) for POD
  template:
    metadata:
      labels:
        app:nginx
    spec:
      containers:
      - name: nginx
        image: nginx:1.19
        ports:
        - containerPort: 80    # binding port

Apply the configuration
$ kc apply -f nginx-deploy.yaml

to change , edit the file and change the replicas..

$ vi nginx-deploy.yaml

apiVersion: apps/v1
kind: Deployment
metadata:
  name: nginx-deployment
  labels:
    app: nginx
# specification for deployment
spec:
  replicas: 3
  selector:
    matchLabels:
      app: nginx
# specification (blueprint) for POD
  template:
    metadata:
      labels:
        app:nginx
    spec:
      containers:
      - name: nginx
        image: nginx:1.19
        ports:
        - containerPort: 80    # binding port


$ kc apply -f nginx-deploy.yaml


in summary, what we covered so far,

Create (CR), Update (U), Delete (D) -> CRUD commands

Deployment created
$ kc create deployment <name-of-deployment>

Edit deployment
$ kc edit deployment <name of deployment>

Delete deployment
$ kc delete deployment <name of deployment>

Get Kubernet components
$ kc get nodes | pod | services | replicaset | deployment

Debugging PODs
Log to console
$ kc logs <Name of pod>

Get terminal of running container
$ kc exec -it <pod_name> -- /bin/bash

Using config file to create pods

Create and apply configuration
$ kc apply -f <config.file.yaml>

Delete with config file
$ kc delete -f <config-file.yaml>

Troubleshooting
$ kc describe deployment <deployment-name>
$ kc describe pod <my-pod>

=================================


Introduction to YAML file in kubernetes

Overview
- There three parts of config file
- Connecting deployments to service to pods


First 2 lines will tell you what you want to create.

kind: Deployment # here we are creating deployment. first letter is uppercase.
kind: Service    # here, we are creating service

apiVersion: v1 or apps/v1    # for different api version,  you have to look for particular version.

1. metadata of the component you are creating.
name of the component,
for eg,
metadata:
  name: nginx-deployment

2. Specification
- each component configuration file will have specification.
  whatever information you need, you can specify here.
some examples,

spec:
  replicas: 2
  selector: ...
  template: ...

or
spec:
  selector: ...
  ports: ...

Note: The attribute of spec are specific to the kind (such as deployment, pod) you are creating.

3. Status
- it is automatically generated and added by kubernetes

What k8s does is it checks what is the desire state and what is the actual status of the component.

For eg, lets say there are 4 replicas running and your desire state is 2 then k8s will compare this info. If info is not matching, k8s thinks there is something wrong. it will try to fix it so it wil terminate 2 out of 4 when you apply it.

When you apply the configuration, k8s will add status of your deployment and update the state continausly.

If you change the replicas from 2 to 5, then it will first check the status with specification, then it will take a corrective action.

How/where does k8s gets the status data?
- k8s has a database called etcd.
- Master node keep the cluster data. Basically etcd holds the current status of any k8s component in key value pair.


======================================

Format of config file
- its a yaml file.
- human friend data serialization standard for programming languages.
- syntax: strict indentation

use "yam validator" to validate your code.

- Make a habit of storing the config file with your application code or have your own gitrepo.


Layers of abstraction
- Deployment manages a ..
- ReplicaSet manages a ..
- POD is an abstraction of
- container

Deployment manages POD in reality.


template
- template holds the information about the POD.
- You will have specification about the deployment and
  you will have specification about pod inside the deployment.
  the specification can be the name of the container, the type of image or the ports that will be open.


Connecting components (Labels, selectors and PODS)
- how the connection is established?
by using labels and selectors, connection is established.

Note: metadata part contains the labels and
      specification part contains selector

In metadata, you specify component like deployment, pod in key/value pair.

for eg,
labels:
  app: nginx

this label will stick to the component.

So we give POD, the lable through the template.
so the label -> app -> aginx

  template:
    metadata:
      labels:
        app:nginx

we tell the deployment to match all the labels with app: nginx to create a connection.

spec:
  replicas: 3
  selector:
    matchLabels:
      app: nginx

This way, deployment will know what pod belongs to which deplpyment.

As we know, deployment has its own label, nginx.

These two labels are used by the service selector.

specificaion of service, we defined a selector, which basically makes a connection between the service and deployment or its pod.

apiVersion: v1
kind: Service
metadata:
  name: nginx-service
spec:
  selector:
    app: nginx
  ports:
    - protocol: TCP
      port: 80
      targetPort: 8080

service must know which pods are registered with it. This connection is made through selector of the label.


Ports in Service and Pod

nginx service
DB service

[root@master week1]# kc apply -f nginx-service.yaml
[root@master week1]# kc get service


how can we validate that the service has the right pods, that it forwards the request to. We can do it using,
$ kc describe service nginx-service


selector,
target port.
look at the output, and end points.

ip address and port of the pods that service must forward the request to.

how do we know these are the right IP address of the pods?

because 'kc get pod' does not give you ip info.

get more info, you will see more coloum and also ip address.
$ kc get pod -o wide

so we know service has right ip address.


Now, lets discuss about the third part (status) which k8s automatically generates.

the way you can do is, through 'kc get deployment

[root@master week1]# kc get deployment nginx-deployment -o yaml

or save it to a file.

when you edit, you will see lots of info added.

[root@master week1]# kc get deployment nginx-deployment -o yaml > nginx-deployment-detail.yaml
$ vi nginx-deployment-detail.yaml

you will see status section right below spec. it is very helpful while debugging.

you also see other information added to metadata section as well.
such as creation timestamp, uid and more


how do you copy the yaml file?
you have to remove the added content.

you can delete the deployment using config file.


# kc delete -f nginx-deployment.yaml
# kc delete -f nginx-service.yaml


==========================================

Complete application setup with k8s components
- we will be deploying two applications.
mongoDB and mongo-express.

we will create
- 2 deployment/POD
- 2 servie
- 1 configMap
- 1 secret

How to create it?
1. First we will create mongoDB POD.
2. In order to talk to the pod, we will need to have a service. we will create an internal service which basically means that no external requests allowd to the pod. Only component inside the same cluster can talk it.
3. After that we will create mongo express deployment.
- one we will need for database URL of mongoDB so mongo express can connect to it.
- second one is credential. username and password of database so that can authenticate to DB.

The way we can pass this info to mongo-express deployment is through its deployment configuration file through environmental variable.  Because thats how the application is configured.

So we will create ConfigMap that contains databse URL. Then weill create secret that contains credentails which we will reference on both inside deployment.yaml

We will have mongo-epress to be accessinble through the browser. In order to do it, we will create external service, that will allow external request to talk to the POD. so the URL will be,
- IP address of Node
- Port of external service.


We will create,
- Mango DB
- Mango Express

- Internal Service

- Config Map (DB URL)

- Deployment.yaml
  - env Variables

- Secret
  - DB user
  - DB pswd

- External service

-----------------------------------------
Request flow

1. Request comes from browser
2. It goes through external service (mongo-express) which is then forwarded to
3. Mongo - express POD.
4. POD then will connect to internal service of Mongo-DB which is basically the DB URL.
5. It will then forward to MongoDB POD where it will authenticate the request using the credentials.


Mongo Express browser -> Mongo Express External service -> Mongo express -> MongoDB internal service -> MongoDB


Now, lets go ahead and work on LAB.

1. Lets go ahead and start minukube cluster

$ kc get all


apiVersion: apps/v1
kind: Deployment
metadata:
  name: mangodb-deployment
  labels:
    app: mangodb    # making connection to POD
spec:
  replicas: 1
  selector:
    matchLabels:
      app: mangodb    # making connection
  template:        # definition (or blue print) for POD
    metadata:
      labels:
        app: mangodb
    spec:
      containers:
      - name: mangodb
        image: mango


so, we have pod info
- name: mangodb
  image: mongo

go to docker hub and search or mongo


now, we will add more config info

$ cat mongo.yaml
apiVersion: apps/v1
kind: Deployment
metadata:
  name: mangodb-deployment
  labels:
    app: mangodb    
spec:
  replicas: 1
  selector:
    matchLabels:
      app: mangodb    
  template:        
    metadata:
      labels:
        app: mangodb
    spec:
      containers:
      - name: mangodb
        image: mango
    # specify ports and env variable
        ports:
        - containerPorts: 27017    
        env:
        - name: MONGO_INITDB_ROOT_USERNAME
          value:
        - name: MONGO_INITDB_ROOT_PASSWORD
          value:

deployment config file is checked into repo
- we will not write admin user/pw on the configuration.

now, we will create secret and reference the value

Now, save your deployment file.        

before we apply the config, we will create secret.


get info from the URL,
https://hub.docker.com/_/mongo


https://www.youtube.com/watch?v=X48VuDVv0do
1:22:35


Thursday, June 10, 2021

RHEL7 - Repurpose RHEL7 machine

 Our one of the physical machine is retired. We have to repurpose it. Had to perform the following tasks.


1. Remove software

2. Rename hostname

3. Change ILO info

4. Update monitoring tools

5. Modify backup


========================

1. Removed the software

- Since this is a linux physical machine, the software I had to removed came with uninstall script. 

- just ran the script, its done. 

- Remove user/group

- Remove all the files reference to the application

- Delete temp files


2. Rename hostname

# hostnamectl - help


3. Update mornitoring tools

- If you use nagios, change it or any other tools, go to settings /config and change it


3. Change ILO info

- Login to console and reboot your OS

- Press F9 to go to BIOS when the menu is displayed.  

- Select system config

- ILO configuration utility

- Network options

-  Change the hosttname here, it says change the DNS Name: mylxhost

- Click on save and exit

- Update DNS record (either on Windows or linux)

-  Reboot the system

- Login back and click on Security -> SSL Certificate -> Generate CSR

- Go to your cert server: 192.168.10.20/certserv

- Copy the the key (csr) and submit here.   

- Download the cert - issue : 64 base encoded


Imporrt

-> Go back and click on import/copy the downloaded certificate


4. Update the hostname record and backup

- Update your master server database 

- Schedule backup


 =========================


Change the hostname in RHEL7

There are multiple ways you can change hostname on RHEL7

1. Using hostname control - hostnamectl command
2. using NetworkManager - nmcli command
3. useing NetworkManager text user interface - nmtui command
4. Modify /etc/hostname file and reboot the machine

1. Using hostname control - hostnamectl command
# hostnamectl -h
# hostnamectl status
# hostnamectl set-hostname myhost01
# hostnamectl

2. using NetworkManager - nmcli command
# nmcli -h
# nmcli general hostname
# nmcli general hostname myhost01
# service systemd-hostnamed restart
# hostname

3. using NetworkManager TUI - nmtui command
Here, you type the command nmtui at the command prompt
- select the option "set the hostname" and press enter
- Type your hostname here and press enter
- change hostname nmtui
- Confirm the change
- and quit the screen
- Restart the systemd-hostnamed service
# systemctl status systemd-hostnamed
# hostnamectl

4. Modify /etc/hostname file and reboot the machine
1. Edit the hostfile and make the change
# vi /etc/hostname.

2. Reboot the machine and verify it
# shutdown -r now
# hostnamectl; hostname

Monday, June 7, 2021

Install HPE Foundation on HPE machine

 How to set up HPE Foundation 2.4.2 repository

1. Copy the software
# mkdir /opt/foundation
# mount -t iso9660 /var/tmp/hpe-foundation-2.4.2-cd1-media-rhel77-x86_64.iso /mnt
# cp -Rvp /mnt/* /opt/foundation
# umount /mnt

2. Set up repo
# cat <<EOF > /etc/yum.repos.d/foundation-2.4.2_.repo
[Foundation-Repo]
name = HPE Foundaton 2.4.2 - \$basearch
baseurl = file:///opt/foundation/RPMS
enabled=0
gpgcheck = 1
gpgkey = file:///opt/foundation/RPM-GPG-KEY-hpe
     file:///opt/foundation/RPM-GPG-KEY-sgi
EOF

3. Perform the update
# yum --enablerepo=foundation-2.4.2-repo check-update

Friday, June 4, 2021

Day12 - Terraform workspace, regex

 Day12 - Terraform - 06042021

Workspace, regex


> mkdir wp; cd wp

> notepad w.tf
provider "aws" {
 region = "ap-south-1"
 profile = "default"
}


variable "type" {
 type = map
 default = {
  dev = "t2.micro"
  test = "t2.small"
  prod = "t2.large"
  }
}
resource "aws_instance" "webos1" {
    ami = "ami..."
    instance_type = "t2.micro"
      security_group     = [ "webport-allow" ]
    key_name = "terraform_key"

    tags = {
       Name = "We server by TF"
    }
}

*/
output "o1" {
  value = terraform.workspace
}

get help
> terraform workspace -h
> tf worksapce list
> tf workspace show


==================


> notepad w.tf
provider "aws" {
 region = "ap-south-1"
 profile = "default"
}


variable "type" {
 type = map
 default = {
  dev = "t2.micro"
  test = "t2.small"
  prod = "t2.large"
  }
}
resource "aws_instance" "webos1" {
    ami = "ami..."
    instance_type = lookup (var.type, terraform.worspace)
 
    tags = {
       Name = "We server by TF"
    }
}

*/
output "o1" {
  value = terraform.workspace
}


> tf worspace show
> tf apply
> tf workspace -h
>

chnage your env
> tf workspace select dev
> tf worksapce show
> tf apply    @ it will automatically understands you are on dev env.

----------------------

Google: terraform regex

regex function

go through the example ..

say you are retriving some values
http://<IP>:<port/path/file.html

- create pattern, format
regex(pattern, format)


regex{}
get only characters
> terraform console
regex("[a-z]+", "24442,5323423basjkdhfsdh4")


do more function

replace function

> replace("1 + 2 + 3", "+", "-")
1 - 2- 3

> replace (hello world". "/w.*d/", "everybody")

There are lots of functions and go through these documents..

--------------------------------------------

FullStack
workspace
- Dev  -> GCP
- Test -> AZ
- Prod -> AWS

EC2 - web server
    - DB RDS server

Azure
- VM instances
- Launch database service


google - multicould strategy example

FE (WordPress)    -> GCP      
DB (MySql)     -> AWS - RDS

--------------------------------------------

google teraform data sources
- to retirve partucular value
and use on other resource..


resource "aws_instance" "app" {
 ami = "$(data.aws_ami.app_ami.id}"
 instance_type = "t2.micro"
}


Terraform commands

 Terraform Commands

refresh - query infrascture provider to get the current state     - State
plan    - Create an execution plan/ preview of what is going to happen    - Plan
apply    - Execute the plan/applies the configuration file        - Apply
destroy    - Destroy the resource/infrascture/ removes one by one in an order. Revert back everything created will be destroyed.
-------------------------
> terraform plan command

How plan creates the plan
ansible core evaluates
- your code - terraform configuration code
- tfstate file

to create the execution plan and decides what needs to be done.
So, it will determines what actions are required to achive the desire state.


it basically checks the file you created that is your desire state (your code) and compares with the existing set up and figures it out what changes or adjustments need to be made in order to meet the desire state.

For eg, change an instance type, create a new instance or user ..

a sample code
-------------

# AWS Provider
provider "aws" {
  region = "us-east-1"
  profile = "default"
}

# resource
resource "aws-instance" "web" {
 ami = "ami...." "web" {
 instance_type = "t3.small"

 tags = {
  Name = "Test"
 }
}

# Create VPC
resource "aws_vpc" "wnet" {
 cidr
}


$ cat storage-db-55a.inv | grep -E "\s+Trya.*\(SAS\)" | awk '{print "%20s| %s\n", $8,$15}' | sort | uniq -c


Pulumi vs terraform vs CrossPlane

 https://www.pulumi.com/docs/intro/vs/terraform/

 I see power on pulumi if you are good on coding


What is Terraform?

Terraform is a popular open-source IaC tool for building, modifying, and versioning virtual infrastructure.

The tool is used with all major cloud providers. Terraform is used to provision everything from low-level components, such as storage and networking, to high-end resources such as DNS entries. Building environments with Terraform is user-friendly and efficient. Users can also manage multi-cloud or multi offering environments with this tool.

Terraform is a declarative IaC tool. Users write configuration files to describe the needed components to Terraform. The tool then generates a plan describing the required steps to reach the desired state. If the user agrees with the outline, Terraform executes the configuration and builds the desired infrastructure.

What is Pulumi?

Pulumi is an open-source IaC tool for designing, deploying and managing resources on cloud infrastructure. The tool supports numerous public, private, and hybrid cloud providers, such as AWS, Azure, Google Cloud, Kubernetes, phoenixNAP Bare Metal Cloud, and OpenStack.

Pulumi is used to create traditional infrastructure elements such as virtual machines, networks, and databases. The tool is also used for designing modern cloud components, including containers, clusters, and serverless functions.

While Pulumi features imperative programming languages, use the tool for declarative IaC. The user defines the desired state of the infrastructure, and Pulumi builds up the requested resources.

Pulumi allows developers to use general-purpose languages such as JavaScript, TypeScript, .Net, Python, and Go. Familiar languages allow familiar constructs, such as for loops, functions, and classes. All these functionalities are available with HCL too, but their use requires workarounds that complicate the syntax.

 https://www.youtube.com/watch?v=RaoKcJGchKM

What is Crossplane?

 Crossplane is an open source Kubernetes add-on that enables platform teams to assemble infrastructure from multiple vendors, and expose higher level self-service APIs for application teams to consume, without having to write any code.

No more about CrossPlane.. 

Pulumi vs. Terraform

Terraform and Pulumi hold a lot of similarities, but they differ in a few key ways. This page helps provide a rundown of the differences. First, Pulumi is like Terraform, in that you create, deploy, and manage infrastructure as code on any cloud. But where Terraform requires the use of a custom programming language, Pulumi allows you to use familiar general purpose languages and tools to accomplish the same goals. Like Terraform, Pulumi is open source on GitHub and is free to use.

Both Terraform and Pulumi support many cloud providers, including AWS, Azure, and Google Cloud, plus other services like CloudFlare, Digital Ocean, and more. Thanks to integration with Terraform providers, Pulumi is able to support a superset of the providers that Terraform currently offers.

Here is a summary of the key differences between Pulumi and Terraform:

ComponentPulumiTerraform
Language SupportPython, TypeScript, JavaScript, Go, C#, F#Hashicorp Configuration Language (HCL)
State ManagementManaged through Pulumi Service by default, self-managed options availableSelf-managed by default, managed SaaS offering available
Provider SupportNative cloud providers with 100% same-day resource coverage plus Terraform-based providers for additional coverageSupport across multiple IaaS, SaaS, and PaaS providers
OSS LicenseApache License 2.0Mozilla Public License 2.0

If you have Terraform HCL that you would like to convert to Pulumi, see Converting Terraform HCL to Pulumi in our Adopting Pulumi user guide.

The following sections go into further detail on the differences between Pulumi and Terraform.

Language Support

Terraform requires that you and your team write programs in a custom domain-specific-language (DSL) called HashiCorp Configuration Language (HCL). In contrast, Pulumi lets you use programming languages like Python, Go, JavaScript, TypeScript, and C#. Because of the use of familiar languages, you get familiar constructs like for loops, functions, and classes. This significantly improves the ability to cut down on boilerplate and enforce best practices. Instead of creating a new ecosystem of modules and sharing, Pulumi lets you leverage existing package management tools and techniques.

For more information on the languages that Pulumi supports, see Languages.

State Management

The Terraform engine takes care of provisioning and updating resources. With Pulumi, you use general purpose languages to express desired state, and Pulumi’s engine similarly gives you diffs and a way to robustly update your infrastructure.

By default, Terraform requires that you manage concurrency and state manually, by way of its “state files.” Pulumi, in contrast, uses the free Pulumi Service to eliminate these concerns. This makes getting started with Pulumi, and operationalizing it in a team setting, much easier. For advanced use cases, it is possible to use Pulumi without the service, which works a lot more like Terraform, but it requires you to manage state and concurrency issues. Pulumi errs on the side of ease-of-use.

For more information on how Pulumi manages state or how to use different backends, see State and Backends.

Provider Support

Pulumi has deep support for cloud native technologies, like Kubernetes, and supports advanced deployment scenarios that cannot be expressed with Terraform. This includes Prometheus-based canaries, automatic Envoy sidecar injection, and more. Pulumi is a proud member of the Cloud Native Computing Foundation (CNCF).

Using Terraform Providers

Pulumi is able to adapt any Terraform Provider for use with Pulumi, enabling management of any infrastructure supported by the Terraform Providers ecosystem using Pulumi programs.

Indeed, some of Pulumi’s most interesting providers have been created this way, delivering access to robust, tried-and-true infrastructure management. The Terraform Providers ecosystem is mature and healthy, and enjoys contributions from many cloud and infrastructure leaders across the industry, ourselves included.

Most Pulumi users don’t need to know about this detail, however we are proud to be building on the work of others, and contributing our own open source back to this vibrant ecosystem, and thought you should know.

In the event you’d like to add new providers, or understand how this integration works, check out the Pulumi Terraform bridge repo. This bridge is fully open source and makes it easy to create new Pulumi providers out of existing Terraform Providers.

Converting From Terraform

Pulumi offers a tool, tf2pulumi, that converts Terraform HashiCorp Configuration Language to Pulumi. It is open source on GitHub, and works for most projects we have come across; if you run into a snag, Issues and Pull Requests are welcome!

To learn more, see Converting Terraform HCL to Pulumi in our Adopting Pulumi user guide.

For an example on how to do this conversion, see our article, From Terraform to Infrastructure as Software.

Using Pulumi and Terraform Side-by-Side

Pulumi supports consuming local or remote Terraform state from your Pulumi programs. This helps with incremental adoption, whereby you continue managing a subset of your infrastructure with Terraform, while you incrementally move to Pulumi.

For example, maybe you would like to keep your VPC and low-level network definitions written in Terraform so as to avoid any disruption, or maybe because some of the team would like to stay on Terraform for now and make a shift in the future. Using the state reference support described previously, you can author higher-level infrastructure in Pulumi that consumes the Terraform-provisioned VPC information (such as the VPC ID, Subnet IDs, etc.), making the co-existence of Pulumi and Terraform easy to automate.

To learn more, see Referencing Terraform State in our Adopting Pulumi user guide.

OSS License

Terraform uses the weak copyleft Mozilla Public License 2.0. Conversely, Pulumi open-source projects use the permissive and business-friendly Apache License 2.0. This includes the core Pulumi repo, all of the open-source Pulumi resource providers (such as the Azure Native provider), conversion utilities like tf2pulumi, and other useful projects.


=======================================

 https://phoenixnap.com/blog/pulumi-vs-terraform

Pulumi vs Terraform: Comparing Key Differences


1. Unlike Terraform, Pulumi Does Not Have a DSL

2. Different Types of State Management

3. Pulumi Offers More Code Versatility

4. Terraform is Better at Structuring Large Projects

5. Terraform Provides Better State File Troubleshooting

6. Pulumi Offers Better Built-In Testing

7. Terraform Has Better Documentation and a Bigger Community

8. Deploying to the Cloud


Thursday, June 3, 2021

Terraform - Remote State Management

 Terraform - 6-03-2021

Today's topic
Remote state management
- using S3
- Lock state - DynamoDB


mkdir ws/s; cd ws/s


provider "aws" {
  region = "ap-south-1"
  profile = "default"
}

google:- terraforom ec2 resource

go to instance adn get the resorce

resource "aws-instance" "web" {
  ami = "ami-....."
  instance_type = "t3.micro"    # you can change this and run apply

  tags = {
    Name = "Hello"
  }

}


> tf init


-----------------------

tfstate file - stores current state of the project not the desire
the desire state will be on our program file that we just wrote

if you work alone, its ok, but what if multiple folks working?


> tf apply


What happens if one person want to change something and other person also want to change at the same time.

-> whoever start the apply command first, tfstate file will be locked by default and second guy will have to wait..


$ cat s.tf
provider "aws" {
  region = "ap-south-1"
  profile = "default"
}

resource "aws-instance" "web" {
  ami = "ami-....."
  instance_type = "t2.small"    # you can change this and run apply

  tags = {
    Name = "Hello"
  }

}


> tf apply

tfstate file will be changed to .terraform.tfstate.lock.info

until the job is completed, other person can not run the apply command.


if everyone is working on their own laptop, code is stored on github.

two employe have their own tfstate file.

if two developers working on same project, then don't maintain two state file on common project.

We don't maintain it locally. We will store it on centralized storage such as nfs. in our case its going to be s3.

You can do everything from your local laptop but we will move the tfstate file to s3 which is going to be a centralised shared location.

How do we manage state file remotely?
How do you manage the lock?

-> We will maintain the tfstate file. s3 is object storage.
- lets go to aws console -> s3 and create a folder which is called bucket
a. Create a bucket :
  - click on create bucket - name it
or

create using code.

> mkdir s3; cd s3

search resource s3 bucket
also look for versioning
 -someone may delete bucket or a file.
 - we don't want any one to delete it. -> look for lifecycle

google for lifecycle prevent_destroy = true


> notepad s3.tf

provider "aws" {
  region = "ap-south-1"
  profile = "default"
}

resource "aws_s3_bucket" "b" {
  bucket = "my-tf-bucket..."

  # state file keep on chaging, so its a good idea to versioning. if someone makes mistakes, you can revert it back.

lifecycle {
  prevent_destroy = true
}

  versioning = {
    enabled = true
  }

}


> tf apply -auto-approve

Note: bucket need to be unique.

now, we have to upload the state file.

> mkdir remotestate; cd remotestate
> notepad r.tf


Now, we will create a new project and we want to create a statefile remotely.
We want the state file to be managed remotely

google: terraform remote state
review the document.

backend ..


provider "aws" {
  region = "ap-south-1"
  profile = "default"
}

resource "aws_s3_bucket" "b" {
  bucket = "my-tf-bucket..."

lifecycle {
  prevent_destroy = true
}

  versioning = {
    enabled = true
  }

}

terraform {
  backend "s3"
  bucket = "my-tf-bucket..."
  key = "my.tfstate"
  region = "us-east-1"
  }
}

}


> tf init    # review the message you see on the screen

> notepad e.tf


resource "aws-instance" "web" {
  ami         = "ami-....."
  instance_type = "t2.small"

  tags = {
    Name = "Hello"
  }

}


> tf apply


tfstate file will be created on s3 bucket.
any change will be updated on remove server/storage.

go to s3, you will see file is uploaded

this does not resolve the chanllenge of lock.

for locking support, they suggest to use dynamo DB.

We are going to create a table on dynamoDB.


------------------------------

Go to aws console and DynamoDB manually or use terraform

on teffarom web page, search for: dynamodb table

dynamoDB state locking - search on tf.com site

> mkdir ddb; cd ddb
> notepad d.tf


provider "aws" {
  region = "ap-south-1"
  profile = "default"
}

resource "aws_dunamodb_table" "basic-dynaodb-table" {
 name        = "tfstate-lock-table"
 read_capacity    = 5
 write_capacity = 5
 hash_key     = "LockID"

 attribute {
  name = "LockID"
  type = "S"
  }
}


> tf apply

enter a value: yes

it will create a dynamoDB table. go to the console and verify it.

you will see the table with primary key.

now, localing state will be managed by dynamoDB table that we just created.


> notepad r.tf
provider "aws" {
  region = "ap-south-1"
  profile = "default"
}

terraform {
  backend "s3" {
  bucket     = "my-tf-bucket..."
  key         = "my.tfstate"
  region     = "us-east-1"

dynamodb_table = "tfstate-lock-table"
  }

}

> tf init
> tf apply

this time, if other team member try to use the state file, first member can execute the program but had to wait the second one.

if other member tries to run, gets an error.

This is how you can lock the locking state.
This is how you can colaborate with your team member.

------------------------------------

registry.terrafrom.io/providers/hashicorp/azurerm/latest/docs#example-usage


how to use azure>
go to registry-> azure -> document -> authentication
authenticate using cli or locally -> find the authentication methid, provider.

once you authenticate, you can launch some resource group.

create VPC, or instances, containers...

Lets see other member wants the check the state

> tf state

you can pull your state
> tf state pull
you will see what is current state going on..


RHEL7 - How to check changelog of RPM packages

 How to check change log of RPM packages on CentOS/RHEL

Read the changelog of RPM packages on RHEL7
# rpm -qa | grep httpd
# rpm -q --changelog httpd

or
# rpm -qp --changelog [/path to the rpm package]

Import public key

# rpm -qa | grep gpg
# rpm --import mykey-2048.gpg


==========================================


rpm: Find out what files are in my rpm package

Use following syntax to list the files for already INSTALLED package:
rpm -ql package-name

Use following syntax to list the files for RPM package:
rpm -qlp package.rpm

Type the following command to list the files for gnupg*.rpm package file:
$ rpm -qlp rpm -qlp gnupg-1.4.5-1.i386.rpm


In this example, list files in a installed package called ksh:
$ rpm -ql ksh


See the files installed by a yum package named bash:
repoquery --list bash
repoquery -l '*bash*'

Syntax
repoquery -l {package-name-here}
repoquery -q -l {package-name-here}
repoquery -q -l --plugins {package-name-here}
repoquery -q -l --plugins *{package-name-here}*
repoquery -q -l --plugins http
repoquery -q -l --plugins ksh

here,
    -l : List files in package
    -q : For rpmquery compatibility (not needed)
    --plugins : Enable plug-ins support

List the contents of a package using yum command

1. Open the terminal bash shell and type:
$ sudo yum install yum-utils

2. See the files installed by a yum package named bash:
$ repoquery --list bash
$ repoquery -l '*bash*'


https://www.cyberciti.biz/faq/howto-list-find-files-in-rpm-package/


manako kuro

 आफ्नै धर्तीलाई सम्झंदा !!!

नयाँ भाग्य कोर्न  
नयाँ मुलुकको लागी
जब घर देश बाट हिंड्छ
परिवारको भविष्यलाई
राम्रोसँग स्रिङ्गारेर
खुशि,र दुखको दोसाँझमा
अल्मलिंदै, रुमलिंदै
आफ्नो प्यारो गाउँ बेशि
पाईला पाईलाले पछि पार्दै
नयाँ  सपना सम्झंदै
एउटा उदेष्यमा  लम्किन्छ - परदेशी

परिवारमा बात कम
खबर कम भो परदेश बाट
न गफ छ, न भेट छ
सुन्य सुन्य छ
एकान्त छ,
उता,
आमा पिंढिमा  बसेर
सोध्छिन रे !
छोरा कहिले आउँछ ?
छोरा दिन गन्दै,
महिना अनि बर्ष गन्दै
समयको वहावमा
यसरि चल्दै छ,
थाहा छैन जीवन
कहाँ पुग्दै छ,
शरीरको रुपरेखा बदलिंदै छ
कपाल फुलेर
कनिका छरे जस्तै भो
खै के को खोजीमा
केहि पाए जस्तो
केहि नपाए जस्तो
दोधारको जिन्दगी
सबै मिलेर नि
कतै केहि नमिले जस्तो
केहि छुटे जस्तो
सन्तोषको सास
फेर्न नसके जस्तो
न देश अट्यो न परिवार
यो मनमा सांच्न लाई
नयाँ मुलुक, नयाँ संसार,
नयाँ  परिवार
अनि नयाँ परिवेश भो विदेश !!!

न देश भो
न भो परिवार यो मनमा साँच्न लाई

न त् देश न त् परिवार

सिक्का हावामा पल्टाएर
भाग्य बदल्न सकिने रहेनछ
बर्मा गए कर्म संगै
त्यसै भएको रहेनछ
सबैको भाग्य एउटै
हुँदो रहेनछ !!!
sikkaa paltaaer sahi halat chuttaaun sakinna


५/१८/२०२१
Vienna, VA


जिन्दगीको समयले घडी घुमाको  छ
सुन्दर कुरा ओईलाएर चाउरिएको छ
समयलाई कसैले रोक्न सक्दैन
एक दिन भुईंमा झरी यहिं मिल्नु छ

जिन्दगीको समय त् आँफै चलेको छ
सुन्दर कुरा ओइलाएर आँफै झरेको छ
रितै हैछ संसारको आउने जाने यहाँ
केहि दिई केहि लिई जानु परेको छ !!!


समयसँगै हरेक सुन्दर चीज ओइलाउँदै जान्छन्, सुकेर खङ्ग्रङ्ग पर्छन् । तर हरेक चीज सुक्दैनन्, केही केही सधैं हरियै रहन्छन्- ‘एभरग्रीन’ ।

‘अ क्लकवर्क अरेन्ज’ यस्तै एभरग्रीन सिनेमा हो ।

के मिल्छ ?

 के मिल्छ ?
काम बाटै काम मिल्छ
काम बाटै दाम मिल्छ
दाम बाटै माम मिल्छ
माम बाटै सान मिल्छ
सान बाटै मान मिल्छ
मान बाटै नाम मिल्छ
नाम बाटै दाम मिल्छ
दाम बाटै दाम मिल्छ
दाम बाटै काम मिल्छ
काम बाटै काम मिल्छ
काम बाटै नाम मिल्छ !!!

Wednesday, June 2, 2021

Day10 - Terraform - terraform function, integration with kubernetes

Terraform - 6-02-2021
------------------------

Class note:-
Today's topic
1. Intergrate terraform with kubernetes
2. How to use terraform functions


1. Start your minikube for kubernetes
> minukube start

google: terraform functions

built-in function from terrraform.io

numeric, string, encoding, filesystem, date and time, hash and more finctions are available.

terraform provides live console

> terrafrom console

gives you terraform console where you can write terraform function

> max(5, 10, 20)
> element(["a","b","c"])

> lookup ({a="ay", b="bee"}, "a", "what?")

lookup function

> mkdir wp/function; cd wp/function


e
variable "region" {

 default = "ap-south-1"

}

# store ami-names based on region, since same ami can't be used on different region
variable "ami" {
  type = map     # map is a dictionary
  default = {
    "us-east-1" = "ami-1234"    # if you from us east 0 use one
    "us-webt-1" = "ami-234"
    "ap-south-1" = "ami-345"
    }
}

# print some output
# print ami based on the region
output "01" {

value = lookup(var.ami, var.region, "ami-456"

}


> tf apply

look at the output
01 ->

whats the use case?
you can use on ec2

google for - terraform ec2 resource


Code becomes more dynamic

resource "aws_instance" "web" {

 ami = lookup (var.ami, var.region, "ami-456" )
 instance_type = "t3.micro"

 tags = {
  Name = "HelloWorld"
}
}

output "01" {

value = lookup(var.ami, var.region, "ami-456"

}

> tf init


Kubernetes
----------

- a platform that manages containers

docker -> containers -> app

Images -> Containers

containers are known as POD in k8s.

> minikube start
> kubectl get pods

google:
terrafrom -> registry -> provider -> kubernetes -> documentation -> authentication

- example usage
read the doc


> mkdir kube; cd kube
> notepad k.tf
provider "kubernetes" {
  config_path = "~/.kube/confg"    # contains key, login info
  config_context = "my-context"
}

> kc get pods


to create instance, you have to create namespace on google, same way, k8s also same thing

look for context info when you start minikube


> notepad k.tf
provider "kubernetes" {
  config_path = "~/.kube/confg"    
  config_context = "my-context"
  config_context = "minikube"
}

> tf init
> tf apply    # nothing to apply at this time


look for example how to launch pod

kubernetes providers
- go to resources section


https://registry.terraform.io/providers/hashicorp/kubernetes/latest/docs/resources/pod


resource "kubernetes_pod" "test" {
  metadata {
    name = "my-kube"
  }

  spec {
    container {
      image = "nginx:1.7.9"
      name  = "example"

      env {
        name  = "environment"
        value = "test"
      }

      port {
        container_port = 8080
      }

      liveness_probe {
        http_get {
          path = "/nginx_status"
          port = 80

          http_header {
            name  = "X-Custom-Header"
            value = "Awesome"
          }
        }

        initial_delay_seconds = 3
        period_seconds        = 3
      }
    }

    dns_config {
      nameservers = ["1.1.1.1", "8.8.8.8", "9.9.9.9"]
      searches    = ["example.com"]

      option {
        name  = "ndots"
        value = 1
      }

      option {
        name = "use-vc"
      }
    }

    dns_policy = "None"
  }
}

modify


> tf apply
> kc get pod

> kc describe <pod>

> tf destroy


launch deployment
go to deployment -> set replication

https://registry.terraform.io/providers/hashicorp/kubernetes/latest/docs/resources/deployment

This is how we can work with kubernetes


How loop works with Terraform (TF)

AWS - Security group ->
EC2 -> add security group/firewall

firewall comes from outside, checked the traffic and checks with the rule (in bound traffic)
port 80/tcp if rule is there, it will allow, if not, it will deny

> mkdir sg; cd sg
> notepad sg.tf

google
terraform security group

look for resource: aws_security_group


provider "aws" {
 region = "ap-south-1"
 profile = "default"
}

#variable "sgports" {
#  type = list
#  default = [80,81,8080,8081]
#}

resource "aws_securit_group" "allow_tls" {
  name ="mysg"

ingress {
  from_port = 80
  to_port = 80
  protocol = "tcp"
  cidr_blocks = ["0.0.0.0/0"] # allow traffic (port 80) from all over
}
}

# you will need VPC

# tf init

# it will create security group
# tf apply


===========================
using for loop


provider "aws" {
 region = "ap-south-1"
 profile = "default"
}

variable "sgports" {
  type = list
  default = [80,81,8080,8081]
}

resource "aws_securit_group" "allow_tls" {
  name ="mysg"

dynamic "ingress" {
  for_each = var.sgports
  content {
    from_port = ingress.value
    to_port = ingress.value
    protocol = "tcp"
    cidr_blocks = ["0.0.0.0/0"] #
    }
  }
}

> tf apply

Tuesday, June 1, 2021

Reading.bz2 zip file

 How to read bz2 zip file


# bzcat yourfile.log.bz2 | grep -i <string> | more

# bzcat /var/log/messages.2021.02.20.bz2

# bzgrep Archive $(hostname -s)-audit.log.2021.05.2*.bz2

# bxgrep -c fuser myhost-audit.log.2021.05.2*.bz2

# bzip2 -d myhost-audit.log.2021.05.2*.bz2


To uncompress

# bunzip2 myhost-audit.log.2021.05.2*.bz2

$ (hostname -s)-secure.20210520.bz2 | grep -E "Starting session.*file_upload" | cut -d' ' -f2 | sort | uniq -c


Terraform - Day 9

 Terraform - class notes


$ cat providers.tf


$ cat variables.tf

variable 'x' {
   default = "t2.micro"
     type = string
}

output "01" {
  value = var.x
}


> tf apply -var-'x-t2.medium"


$ cat aws-main.tf
resource "aws_instance" "web" {
  ami    = "ami-012...."
  instance_type    = var.x

}


$ cat variables.tf

# variable 'x' {
#    default = "t2.micro"
#     type = string
# }

variable 'x' {}

output "01" {
  value = var.x
}

> tf apply -var="x=t2.medium"

in this case, either you pass the value or it will prompt

don't change the code, pass the variable.

or you can create a config with key/value pair.

name must the same, fix file.
> notepad terraform.tfvars
#x="value"
x="t2.micro"

here, you can come and change
we change the value of x.

> tf apply

if you don't define, it will prompt but we defined, it will not prompt but will grab from config file.


> notepad terraform.tfvars
#x="value"
x="t2.large"

> tf apply -var="x=t2.micro"


Lets go to variable file


$ cat variables.tf

# variable 'x' {
#    default = "t2.micro"
#     type = string
# }

variable 'x' {}

variable "y" {
  type=boot

}


output "01" {
  value = var.y
}

commentout the content on aws_main.tf file.

> tf apply
ask you for true or false


boolean is good if you create condition
if you want to do something check the condition, if condition is true, do this if not do the else part.

turnety operator way ,,

condition - question mark? - value1: value2

if condition comes true, display value1 else display value2


Note: true and false should be on lower case

output "01" {
  value = var.y ? "Sam" : "Ram"
}

if true it will return Sam else Ram.


> cd google

provider "aws" {
 region    = "ap-south-1"
  profile    = "default"

}

provider "google" {
   project    = "myproj"
   region    = "asia-south1"
}


$ modify variable file

> tc apply

> tf plan

webapp    -> Testing (QA Team) -> Prod


$ cat aws_main.tf
resource "aws_instance" "web" {
 ami    = "ami-01..."
 instance_type = var.x
 count = 5

}


cat variables.tf
append
variable "lstest" {
type = bool

}

change the value of 5

$ cat aws_main.tf
resource "aws_instance" "web" {
 ami    = "ami-01..."
 instance_type = var.x
# count = 5
 count = var.lstest ? 0    : 1    # if this is true, 0 , count 0 , this instance will not run

}


gcp_main.tf
resource "google_compute_instance" os1" {
  name    = "os1"
  machine_type = var.mtype
  zone    = "asia-south-c"
  count = var.istest ? 1 : 0

boot_disk {
  initialize_params {
    image = "debian-cloud/debian-g"
  }
}

> tf apply -var="lstest=true"


ca variables.tf
append


variable "lstest" {
type = bool

}

variable "azaws" {
default = [ "ap-south-1a", "ap-south-1b", "ap-south-1c" ]
type = list
}

#output "0s2" {
#  value = var.azaws


$ cat aws_main.tf
resource "aws_instance" "web" {
 ami    = "ami-01..."
 instance_type = var.x
 availability_zone = var.azaws[1]
 count = 1

}


> tf apply


map data type

[ 'a', 'b', 'c' ]

system gives the index

you may want to do your own value
say a is id


variable "azaws" {
default = [ "ap-south-1a", "ap-south-1b", "ap-south-1c" ]
type = list
}

variable "types" {
  type = map
  default = {        # maps in curly braces
    us-est-1 = "t2.nano",
        ap-south-1 = "t2.micro",
        us-west-1 = "t2.medium"
  }
}


# output "os3" {
#   value = var.types
#   value = var.types["ap-south-1"]
# }


> tf apply


when your signature becomes autograph you are something ...


Git branch show detached HEAD

  Git branch show detached HEAD 1. List your branch $ git branch * (HEAD detached at f219e03)   00 2. Run re-set hard $ git reset --hard 3. ...